
Introduction
In the ever-evolving world of technology, keeping web browsers up-to-date is vital for both security and performance. Building on my previous insights about managing vulnerability remediation with Google Chrome and Wazuh, I delve into using Level Remote Monitoring and Management (Level RMM) to automate keeping web browsers synchronized with the latest versions.

Overview of Level
Level’s RMM platform stands as a cornerstone for IT professionals, offering extensive monitoring and management capabilities. Its most notable feature for our purposes today is the ability to run scripts as monitors and enable the maintenance of software, like web browsers, to keep them consistently updated. This not only enhances security but also ensures peak performance of the software.
New to Level? Learn more at https://level.io.
Previous Posts
This guide builds on the backbone of a few previous posts, and what really drove this post to be created. Be sure to check them out before reading on, as they shed some important light on why a software monitor is critical on your endpoints.
Managing Vulnerability Remediation: The Case of Google Chrome and Wazuh
Discover the critical importance of timely vulnerability remediation as we dive into managing high-risk exposures from outdated Google Chrome versions reported by Wazuh. Learn how a crafted ChatGPT script and strategic use of RMM tools can effectively mitigate security threats and streamline software updates.
Streamline IT Management: Enable Secure Operations Across Your Enterprise with Level
Today I’m talking about Level! Level is a robust Remote Monitoring and Management (RMM) solution, offering extensive support for Windows, macOS, and Linux. It’s designed for MSP/MSSPs and IT teams of all industries/sizes, emphasizing security, efficiency, and scalability. With affordable, flexible plans and comprehensive remote capabilities, Level empowers IT teams to manage diverse environments effectively, all while ensuring top-tier security and compliance.
The Role of Monitors in Level
Monitors in Level are central to this process. They can be set up to vigilantly track software versions and initiate appropriate actions when an update is necessary. For a detailed understanding, the official documentation on script-based monitors provides comprehensive insights.
Step-by-Step Guide
Pre-requisites: Before diving into this guide, it’s important to note that it assumes you have already set up a few key components:
- A Level account, created and configured for your operational needs.
- The RMM agent installed on a remote or testing machine.
- Scripts downloaded from my GitHub Repository at robertherbaugh/Public-RMM-Scripts, which will be essential for the steps outlined.
- “MAC – Install/Update Firefox” script already loaded into Level
1. Setting up Level RMM
We will start by adding the monitor script to our Level script section. This is accomplished by doing the following.
- Navigate to the Script Function (https://app.level.io/scripts)
- Click “Create Script”
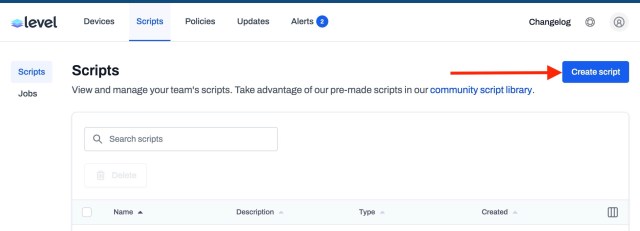
- Give your script the desired name.
- I prefer to use something like “OS Type – Software Name – Function”
- For example: “MAC – Firefox – Version Check”

- Click “Confirm”
- This will open the window below to create the script.

- Next we will type a description.
- This is important, as documentation for processes is key to the success of consistent operations within an IT environment.
- Configure the Language for the OS Type.
- Here I choose “Bash” since this is for a macOS device.
- NOTE: it is imperative to choose the correct language, or you will run into execution errors.
- Configure the user that the script should run as. Keep in mind, some commands must be run in the context of the user and not the “root” or Admin account. Here we can choose System without issue.
- Paste the script text that you downloaded from my GitHub.
- Click “Save script”

2. Configuring Monitors:
The next step involves setting up monitors tailored for tracking the versions of various web browsers. This will include scripting conditions that check for the most current versions.
- Navigate to the Policies Function (https://app.level.io/policies/monitor-policies)
- Click “Create Policy”

- Give your monitor the desired name.
- I prefer to use something like “OS Type – Software Name – Function”
- For example: “MAC – Firefox – Version Monitor”

- Next we will configure the monitor.
- Click “Add New Monitor”

- Populate the newly loaded dialog with the required information.
- Give your monitor a name.
- Here we will use the same as before “MAC – Firefox – Version Monitor”
- Type: “Run Script”
- Severity: “Information”
- You can set this to your desired level of importance. This is key for SLAs and notifications.
- OS: Choose the appropriate OS Type
- Here we choose “macOS” since this is a Bash script written for macOS devices.
- Script: Choose the script we created in the previous section.
- “MAC – Firefox – Version Check”
- Script Output: “Contains”
- NOTE: I previously used “Does Not Equal” but per Level best practices, it should be “Contains“. I will update the script at some point to deliver a more true/false output to alleviate future issues.
- Value: “Up to date/Not Installed”
- We want to check that the script output is “Up to date/Not Installed” so that it triggers the remediation which is the update script if the software is out of date.
- Run Frequency: “Hours”
- You can type “168” in the field, even though it only shows every 24. We only want to check for updates every seven days.
- Trigger: No change (default is “1”)
- Auto-Resolve: “Yes”
- Remediation Script: Your desired run script.
- If you have reviewed my previous post, you will know I had already created the update script. Here I will select it. You will need to create it (with the steps above), if you haven’t already done so.
- Send Notifications: configure as for your desired configuration.
- Give your monitor a name.
- Click “Add monitor”

You will now see that the monitor has been added. Next we will need to add the targets for the script to run against.

In the target section, we will configure as follows.
- Click the Target icon to the right.
- Select the tagged devices that you wish to include.

Conclusion
That is it! You have now configured a monitor script, setup monitoring policies, and provided automated remediation. We can check to see if it’s working by going to our Alerts section. As you can see from the screenshot below, my desktop had triggered an alert, and executed the remediation script. THIS is the power of automation and will save you countless hours in making sure that your software stays in a desired, updated, less vulnerable state.

Automating web browser updates through Level RMM is just the start to establishing an efficient and reliable method for maintaining endpoints and servers, both for software security and performance. This guide is designed to simplify the process, making it accessible to IT professionals looking to enhance their software management strategies.
Thank you for joining me in my guide today, and I hope that you were able to understand a bit more of this powerful software. Be sure to share this post with other IT professionals for a quick overview of how this platform can work for you!
Notes:
It is important to take note of the following items before putting this into production.
- Scripting Automatic Updates: The crux of this setup is scripting the automatic updates. This script gets triggered when an outdated browser version is detected, ensuring that the browser is promptly updated.
- Testing and Validation: It’s crucial to test this setup. Simulate scenarios where the browser is outdated and observe if the update process is triggered and executed correctly.